Friday, November 29, 2013

Urban Agility (Dog Parkour) for Teeter Fears

There are probably quite a few of you out there that have done agility long enough to encounter the dreaded teeter monster of agility class lore. Some of your dogs may be convinced that it is a obstacle specifically designed to destroy their very being where others of you are anxiously awaiting that fateful day when your dog first encounters the teeter of doom.


Well, there is good news for you!


It is completely possible to use the skills you might learn in Urban Agility to help your dog learn that the teeter isn’t a scary obstacle and could even be considered FUN! It takes just a few simple steps and once you have these well mastered, you should be well on your way to a fast, confident teeter performance.


The things that scare most dogs about the teeter is that it MOVES (gasp, that can’t be good! I’m going to fall to my doom!) and it makes NOISE (things that make noise have been scientifically proven to eat dogs, don’t you know??). We can use this knowledge to design a plan that teaches our dogs that things that move and make noise are good.


Are you ready for that? Good.


1) Teach your dog to stand on things. At this point they should be things that are solid and won’t move when he steps or jumps onto them. Good objects to look for are stairs, platforms, walls, loading docks, etc. Repeat until he is confidently jumping on everything you ask of him.


2) Gradually introduce objects that move. Start with things that move a VERY LITTLE bit and don’t make noise when they do so. This can be things like cardboard boxes, laundry baskets, etc. Be sure the object is appropriate for his size, and is safe. You can gradually increase the movement of these objects. Little kid toys with wheels seem to work very well (and you end up with some pretty cute tricks too!). Reinforce your dog everytime he gets onto one of these objects and it moves.


3) Teach your dog that making noise is a good thing. Teach your dog to knock over or touch objects that might make some noise. Good things for this are tarps, bags, mugs, water bottles etc. Remember to reinforce with delicious treats or a fun game every time he makes noise. Gradually find things that make more noise. We have found placing metal objects inside other metal objects makes the most racket.


4) Now combine the two skills. Find objects that both make noise AND move. Be creative here and try to find as many different objects as possible. The more things you find, the more comfortable your dog is going to be when introduced to a teeter. It will simply be one of those “weird things that move and bang around to give me cookies.”


5) Find teeter like objects. Be sure to find objects that move like a teeter. Placing a pool noodle under a board will do this, as well as finding a seesaw at your local playground.


6) Repeat this WHOLE process with a real teeter. Teach your dog to walk on a plank, then teach him to make it make noise, and to move it, then put the moving and the noise together at a low height. Gradually increase the height until you can show off how much your dog loves the full teeter to all of your very jealous friends. The more work you do in the previous steps, the faster this one will go, so do your homework!


This video will give you a brief introduction into the first few steps of training a teeter:

Monday, November 25, 2013

Caleb Backpacking Update: Urban Agility (Dog Parkour) for Conditioning and Rehab

I am so excited how well Caleb did on the backpacking trip! The past five weeks of conditioning seems to have really paid off. One of the benefits of winter backpacking in Ohio is that no one is around, so the dogs get to run off leash. Obviously they enjoy this, but I was concerned how he would do with 35+ miles of off leash running, and was prepared to leash him and give him NSAIDs for pain.


Day One:
We hiked around 11 miles, the dogs probably ran double that. No limping! I kept expecting him to limp, but he was running and jumping and hiking without any signs of pain.


Day Two:
Everyone was a bit tired, but we had another 11 mile day. Caleb started limping a little bit about two hours into the hike. It was only an occasional limp, and not very obvious but since we still had two tough days of hiking ahead of us we gave him a little of the NSAID. We only gave him ½ dose (NSAID rationing, Bug’s knees without 5 weeks of conditioning were not holding up nearly as well), but that seemed to be enough and he ran around without any signs of pain the rest of the day.


Day Three:
We knew it was going to be a long 13 mile day, so I gave Caleb a ½ dose of NSAID right away.  No obvious signs of pain the whole day!


Recovery:
He recovered way faster than we did. Caleb got an NSAID Tuesday night, because no one wants to live with a sore grouchy Caleb. Wednesday morning he seemed completely fine, no limping at all!


Vet Note:
I am extremely pleased with how well Caleb did backpacking. In the past he has become pretty sore and would get very grouchy (to the point of growling and snapping in the tent if disturbed) but that was not the case on this trip. He likely would have continued to be fine without the NSAID, but they work much better when used proactively so we made the decision to treat if there was a question. Good job Caleb and Karin! Keep up the good work!

Wednesday, November 20, 2013

Caleb Week 5: Urban Agility (Dog Parkour) For Conditioning and Rehab

We seem to have found a better balance between what will make Caleb really sore and yet still doing enough to see the benefits. This is probably helped by the fact that he seems to be recovering from being sore or tired faster than when we first began. Also, this last weekend he spent three nights away from home at camp and seemed to recover from this pretty well. As of the posting of this, Caleb is on a 3-day 30-mile backpacking trip, so stay tuned to see how well he recovers from that. Here’s what we’ve been working on:


Walking through ladders: We had a ladder at camp made of 6-8” flyball jumps and pool noodles. He did well at both picking up his feet and at placing them in the appropriate location. This exercise is designed to increase his range of motion and proprioception. We will continue to use this exercise in the future and will change up the ladders to make them more difficult.


4 feet on, 4 feet in, backing up on objects: Same as the previous week. We did see some progress from the previous weeks. He will now back onto an object with either of his back feet which points to a more equal balance of strength between the two back legs.


Balancing on objects that move(fitpaws, exercise ball, etc) We moved between stands and sits while on an object that was wobbly. We also used a treat to change Caleb’s balance to force him to readjust his weight distribution.  This exercise intended to increase balance and strength.


Walking.  We  went for a couple long walks, but did not have him run as he seemed to be sore after his run last time, and was tired the day that we wanted to run. This exercise is intended to increase endurance.


Jumping. At our training class on Wednesday, one of the exercises included jumps. In the past Caleb has been hesitant to jump and very sore afterwards. We set the jumps to 12” and he seemed to willingly take the jumps after a warm-up and was not very sore later.


Vet Note: I’m happy with the improvement Caleb is showing! It will be interesting to see how he does on the backpacking trip, which will likely include a lot of walking, jumping, and sleeping on hard ground. We have prepared for him becoming sore on this trip by including an NSAID for Caleb in his supplies.

Thursday, November 14, 2013

Mat Work for Backpacking


Sleepy good dogs take adorable pictures!
Over here in snowy Ohio, we are gearing up for a backpacking trip (yes, we realize that there is snow on the ground and we are willingly choosing to sleep outside) with the dogs so we thought it would be fun time to discuss one of the skills that we find is very useful while out on the trail.


We are quite well aware of the fact that the more normal of you have no intention of coming out of hibernation until the spring, so we have specifically chosen a skill that is useful in many different areas. And that skill is the ever loved ‘Go to Mat.’

Maddie demonstrates a good mat behavior.
In ‘Go to Mat’ the dog learns to seek out his designated mat and relax in a down on it until released. This becomes a useful behavior to have whenever you have to take your dog with you anywhere that he might have to do some waiting (have you been to your vet’s office recently? you WILL have to spend at least SOME time waiting…) but is particularly useful while on the trail.

There are many awesome resources out there to learn how to train your dog to do this behavior (and we will have a short feature on it in our upcoming ‘Husbandry Skills’ video; you should be SUPER excited about it!) so we aren’t going to go into the specifics of how to train it. What we are going to do is to teach you some of the specific tricks we have found useful while out in the backcountry.

1) Teach your dog to go to mat on something you are ALREADY planning to carry. This might be a sweatshirt, a sleeping pad (we love these!), or a tarp. You’re more likely to bring and use it if it isn’t adding weight to your pack.

We CAN share.
2) Your dog should be able to share his mat. This might be with you, or another dog on the trip (as long as your dog is okay with this dog!). When you are all sitting around the campfire, YOU will probably also want to practice your mat relaxing behaviors and the ground gets awfully cold pretty quickly. It’s nice if your dog will share his mat with you. And it also makes you feel like he loves you when he cuddles with you for warmth!

3) Back your mat up with a tether. There are lots of distractions in the woods (squirrels, deer, other campers with better dinner) and it’s really unfortunate to discover that RIGHT at bedtime your dog has decided he needs a midnight snack of chipmunk. It takes a lot of stress off of you and allows you to focus on getting camp set up if you don’t continually have to keep one eye on  your dog to be sure he is still on his mat.

You can even use your mat in the car!
4) Take your mat into the tent. This will help your dog to relax for the night, and will (hopefully!) have the added benefit of preventing him from deciding that your face is the most comfortable spot to sleep. Not that we have any dogs in our group who would think that.

We hope that you will find these skills useful when you are in the backcountry. And remember, even if you have yet to discover the joys of winter camping (don’t worry, you will) it is always wise to begin preparing for the spring now. Start training a good solid mat behavior now so your dog is ready to head out on that very first beautiful day next spring!

Completely gratuitous sleepy dog picture.


Monday, November 11, 2013

Dazz Week 4: Urban Agility (Dog Parkour) For Conditioning and Rehab

Dazz has been making steady progress, enough to do well at a weekend of dog camp with slippery floors and a decent amount of stairs! At home she’s able to go down the stairs in control, and takes a step on every one rather than sliding or jumping down any. Here’s what we’ve been working on:

Feet in an object: Using boxes, laundry baskets, and even a round sled, we’re working on hind feet awareness and balance by stepping into and out of things. With smaller things we shoot for two feet at a time. This is especially difficult in the back as she has to narrow her stance and focus on balance.

Feet on an object: This week we’ve practiced putting her front feet on a box and stepping down one foot at a time. This way she has to balance and lower herself slowly.

Backing: Still working on backing up, but her endurance is improving. She no longer ends in a sit, but a stand!

Dazz Squats: We’ve invented a new Dazz exercise! I kneel down and have Dazz put her front paws across my leg. She then sits and stands back up. Ideally, this will build into sitting and standing with her paws on a box or step, but right now she still needs her front legs to help pull.

Vet Note: Dazz continues to do well and show small signs of improvement. It was nice to see her able to navigate slippery floors and stairs. On multiple occasions, she was making purposeful movements with her back feet, especially when placing them in an object. The plan is to continue pushing the proprioception and range of motion exercises while gradually increasing the strengthening components.

Friday, November 8, 2013

Blindfold Cupcake Decorating

What happens when you combine cupcakes, colored frosting, candy, more colored frosting and blindfolds? A mess. And a LOT of laughing. And more mess. Possibly with some accents and bonnets thrown in. Oh wait, and did I mention that there is a mess?

But beyond that mess is a purpose, and a history. The first time we did this activity was with pizza, three years ago. The campers worked in pairs or small groups. One was blindfolded, the other gave directions. We gave them very little instruction initially, just that the learner could not be touched or physically guided in anyway and that they must stay blindfolded. Blue cabin had four or five pizzas to make, but because of a cookie sheet shortage, two of these pizzas were going to be made in a pan with 1” sides.  Dough was spread out, a camper was blindfolded, a few more instructed and we sat back and watched. The first few went about as well as you could imagine, with a very interesting distribution of ingredients, but they were still edible. The problem came when blue cabin got to the pans with sides. Sauce was poured and then more sauce, until finally someone convinced the “learner” to stop. Apparently the lack of side on normal pan had been some sort of cue, and without it information of when to stop was missing. 

At this point in time the campers realized that they needed to remove some sauce, and gave instructions to Abby on how to get sauce back into the bowl. Unfortunately for them, they were lacking in clarity, and although the scooping off occurred for a few minutes, it was all done with the wrong side of the spoon. Frustration occurred, and they decided to just go on and add the cheese. Needless to say, the “pizza soup”, as we refer to it was not edible, but a good lesson was learned. Clear communication is important! If the learner is not understanding something it is not their fault. Change the way something is being taught or explained instead of getting angry or frustrated.

The purpose of blindfolded cupcake decorating is the same, but it allows for more creativity and an increased challenge. And the campers love it, to the point that we were going to decorate “fancy cupcakes” instead this year instead of blindfolded cupcakes like last year, but they refused. Watch the video below of Rachelle giving instructions to Helen. Notice the clear directions and the focus despite the distractions and accent.


Thursday, November 7, 2013

Training Urban Agility (Dog Parkour) Skills: Gap Jumps

Training Urban Agility Skills: Gap Jumps

Skill: Jumping between objects: Dog jumps between two walls, posts, curbs, etc. without touching the ground in between.
Benefits: Increased muscular strength and proprioception, increased confidence, increased ability to work with distractions
Sports applications:  Agility- Jumping; Obedience-directed jumping, sit, down, stand; Flyball-jumping; Barn Hunt-Straw bale climb.
How to train: Your dog should first be comfortable with the skill of jumping on an object. Now, find a low, sturdy object with another low, sturdy object very close to it (usually start with less than 1ft away, even smaller for little dogs). It should be tall enough that the dogs see it as an obstacle, but not so tall that it is intimidating. Encourage your dog to step between the two objects and reinforce your dog when he is on the second object. Gradually increase the gap distance, the height of the objects or the speed. At first he may simply step between the two. Don’t worry about this, as you increase the distance between the objects and the speed of approach, he will naturally begin jumping between them.
Safety: Always spot your dog, be ready to catch him or provide assistance if needed. Let your dog choose to perform the behavior, and then reward. Make sure your dog has a chance to look at the gap jump before deciding if he can do it. As you get close to the max distance your dog can perform, he may hesitate while considering the distance. Allow him this time, and reinforce whatever decision he ends up making as you want your dog to make smart choices about his physical abilities. Lift your dog down from the wall or find an alternative route down if jumping above dog’s shoulder height.
Advanced Version: Train your dog to jump between small diameter objects! These require quite a bit of precision and will take time. Make sure to start low and spot your dog. Also, be sure it is of a diameter that your dog can balance on when not jumping to it!
Send your dog to jump between specific objects at a distance.
Practice obedience exercises on the objects: sit, down, spin, stand.

Monday, November 4, 2013

Caleb Week 3: Urban Agility (Dog Parkour) For Conditioning and Rehab


We have been trying to find a balance between doing enough exercise that he builds strength, but not so much that he is sore and grouchy the next day. In addition to the exercises from the first week we have added a few new ones.

Walking through ladders: Slowly walking through ladders, with emphasis on rear end movement  and actually walking instead of jumping.  We did ladders flat on the ground, ladders with one end raised about 8 inches, and a ladder flat on the ground with additional challenges added. This increases range of motion and proprioception without adding too much impact.


4 feet on, 4 feet in, backing up on objects: Same as the first week. We did see some progress from the first week. The first week he would only put 3 feet on the pedestal. This week we were able to get both 4 feet on the pedestal! He could also reliably get four feet into the pink box, unlike the first week where he could only do it once. This is probably as a result of a combination of increase of training and increase in strength and balance.

Walking and running:  We  went for a long (9 miles) woods walk, a few other short walks, and a 2 mile run. He was sore after the woods walk, not surprisingly. Caleb was limping at the very end of the run so we stopped a little bit early, but he did not seem to be sore the next day. This exercise is intended to increase endurance.

Balancing on objects that move (fitpaws, exercise ball, etc) We spent some time standing, sitting, and changing positions on both the fit paws and exercise balls. This exercise intended to increase balance and strength.

Vet Note: Caleb is showing small signs of improvement over the last two weeks. The most encouraging sign is that he is no longer extremely sore after doing his exercises. He also seems to be recovering faster than in previous weeks as evidenced by his quick return to not limping after his runs and walks. His improvement on the exercises is encouraging as it points to an increase in both strength and balance, both of which are important for long term success.

Friday, November 1, 2013

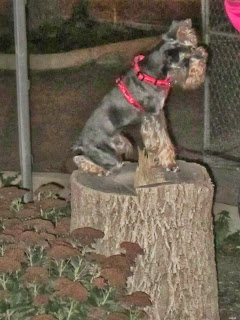
Training Urban Agility Skills: Jumping on Objects


Skill: Jumping on Objects: Dog jumps on walls, logs, rocks, benches, posts
Benefits: Increased muscular strength and proprioception,  increased confidence, increased ability to work with distractions
Sports applications:  Agility- Table, Jumping, A-frame; Obedience-directed jumping, sit, down, stand; Flyball-jumping, box turns; Barn Hunt-Straw bale climb.
How to train: Find a low sturdy object. Mid forearm to elbow height is a good starting point, it is tall enough that the dogs see it as an obstacle, but not so tall that it is intimidating. Reward any paw interaction, shape the behavior until your dog will put all four paws on the object. Don’t worry about your dog jumping at first, as the object gets taller and you approach it with more speed, your dog will make the transition from walking onto the object to jumping onto it.  Gradually increase the height of the object, while always working within the comfort level of your dog.  As always, work with your dog with a variety of objects.
Safety: Always spot your dog, be ready to catch him or provide assistance if needed. Let your dog choose to perform the behavior, and then reward. Lift your dog down from the wall or find an alternative route down if jumping above dog’s shoulder height.
Advanced Version: Train your dog to jump onto small diameter objects! These require quite a bit of precision and will take time. Make sure to start low and spot your dog. Also, be sure it is of a diameter that your dog can balance on when not jumping to it!
Send your dog to jump onto specific objects. Practice left and right.

Practice obedience exercises on the object: sit, down, spin, stand.