Friday, April 4, 2014

Dog Parkour Safety

It is our favorite time of the year again, Outdoor Dog Parkour time! Like any sport or activity Dog Parkour has its risks. These risks can be minimized by following a few basics guidelines.

Harnesses: Proper equipment is key! All dogs in our outdoor classes wear harness that clip on the back. Harnesses help people spot their dog, but they also mean that if a dog ever slips the pressure from the leash is spread throughout the dog’s body instead of just their neck.

Spotting: Always be ready to catch or assist your dog! Before you teach your dog any parkour skills teach him to be comfortable being handled, picked up and helped.

Shoulder Height Rule: Dogs should only be jumping down from objects as high as their shoulders. This is ESPECIALLY important on concrete! Jumping down is a lot of impact on the dogs body and can lead to injuries. Before you ask your dog to jump up on something more than shoulder height, make sure they have a safe way to get down. This may be a shorter drop elsewhere, or you picking him up. Dogs with long backs, young or old dogs, or dogs with predisposition for musculoskeletal injuries should be limited to even smaller drops.


Weather: This isn’t often a huge concern in the spring (although the rain does make surfaces extra slippery) but as the weather starts to warm into summer, be conscious of the heat and sun. Be sure your dog (and you!) remain well hydrated and remember that black or shiny surfaces get hotter MUCH faster than others. If the surface is too hot for you to walk on without shoes, it’s too hot for your dog.

Inspecting obstacles: It is your job to keep your dog safe! Before you ask your dog to do anything, check to make sure it is safe. Look for rust, nails, sharp edges, broken objects, glass or anything that may hurt your dog. Make sure the object you are asking your dog to interact with is sturdy and safe.

Let your Dog Choose: Parkour should ALWAYS be your dogs choice. Encourage your dog, but never force him to do anything. As your dog gets more confident with parkour be sure to teach and allow “intelligent disobedience”. The best trained dog is the one that does everything you ask within his physical limits. Any time your dog evaluates an obstacle and decides he can’t perform it, be sure to reinforce that decision. If you truly believe that it is close to your dog’s limits, come back to the obstacle at a later time and you might find that your dog’s confidence has increased.

With these tips in mind, you and your dog are on your way to SAFELY enjoying outdoor parkour!

Friday, March 14, 2014

Almost Spring!! Dog Parkour Preview

Here at Adventure Unleashed, we are extremely excited that it is almost spring! Spring means more hiking, backpacking trips, outdoor play and perhaps most excitingly, Outdoor Dog Parkour is back!! We decided to celebrate the first hint of nice weather with our Outdoor Dog Parkour Preview, a free class designed to show dogs and humans what Dog Parkour is all about. The dogs learned all about balancing, climbing, going through and under objects and most importantly, working with and having fun with their owners!

Sky practicing balancing and turning on the wall.

Allie climbing between two benches
Ruthie being extremely brave.
Parkour can build confidence in shy and fearful dogs!
Agnes practicing going under.
Brindley weaving through the bike racks.
Magnum balancing on a very tricky rock wall.


Carlos practicing sits on strange surfaces (Remember Carlos!? He was one of our dogs from our shelter workshop)


                          Puppy Parkour graduate, Lucy
                 practicing walking on strange surfaces.

Monday, February 17, 2014

Slip-sliding time!

With it being winter you probably think I am going to write about how you should teach your dog to walk nicely on a leash so that you don’t slip and fall down. Well, you should know a secret about Adventure Unleashed’s dogs. We don’t CARE about teaching our dogs to walk nicely on a leash. We can (and our old, responsible dogs have accidentally learned not to pull unless they are on a harness) but think there are more important things to learn first. Like how to jump and balance on a tiny post or walk across a tiny tree over a river.


So what might I be writing about with that title?


It’s something we have been contemplating, discussing, recontemplating and then rediscussing for a few months over here at Adventure Unleashed.


Let’s start with a story.


When we first started teaching indoor class, we would find an AWESOME new toy at the store, buy it, and our dogs would play on it (ahem, I mean TEST it). Then, we would excitedly introduce the toy in class, only to have people mildly disappointed that their dogs were slipping on the toy. So we started putting grippy things on EVERYTHING. It became our thing. We were experts at cutting the grippy stuff into JUST the right shape and convincing the duct tape to bend to our will around crazy corners.


And we were happy with how much more confident our beginner dogs were to try the objects once it was a grippy surface. But something was missing. We started thinking back to when we first brought the toys home and our dogs would happily play on them with no trouble. What was different about OUR dogs than the dogs at class? Why would they play on these toys when even our more advanced dogs had trouble?


After a decent amount of discussion we figured out that it was because our dogs had learned how to avoid slipping as much as possible and how to recover when they do begin to slip. Suddenly, we had yet another unusual skill that we accidentally taught our dogs and now needed to teach the dogs in class.


Learning to be steady on slippery surfaces seems to be a combination of several skills. First, it requires a good deal of core strength. The dogs need to be able to hold each of their limbs close to their body without bracing them against a sticky surface. You’ve probably seen (and chuckled at) the dog who sits on a tile floor and his front feet start to slide out until he is in a down. A dog with enough core strength to hold his front legs in the proper position won’t have this problem.


Second, the dog needs to be comfortable with falling and being spotted. The fastest way to have a problem slipping is for the dog to begin to get worried about their footing. When this happens, most dog’s first reactions are to dig in with their claws and begin to move in more frantic ways. We noticed when watching our dogs that when they began to slip, they moved in very predictable ways, shifting their weight to more stable feet, in an attempt to correct this. We never saw them attempt to dig in with their nails and if they couldn’t stop the slipping, they simply got off in a controlled manner (what we like to refer to as a controlled bail). By knowing how to shift weight, and how to bail safely, our dogs are able to safely handle the demands of a slippery surface.


We have now started systematically adding slippery surfaces into our classes as dogs become more advanced. We start with textured but slightly slippery surfaces on a low, wide object and progress to higher, smaller, and more slippery surfaces.


Being able to adapt quickly to changing surfaces makes our parkour dogs more resistant to injury and better able to maintain mobility as they age. Since the dogs know where their body is in space, how it moves, how to adapt to sliding, and how to “bail” safely, they become better athletes who are able to maintain a high quality of movement for as long as possible.


So what are your waiting for? Start giving your dog the benefits of “slide training” today!


Monday, February 3, 2014

6 Essential Skills to Teach Your Dog Before Heading on a Backpacking Trip


A backpacking trip with your four legged friend can be a lot of fun, but it can also be a disaster waiting to happen if you aren’t prepared. Teach your dog these six essential skills to ensure you have the best possible experience in the backcountry.
Wait
A good wait is an extremely versatile cue and is essential to having a safe and fun trip. The “wait cue” should mean stop right where you are and do not move until I tell you to. This behavior allows you to safely navigate a slippery or dangerous obstacle while your dog waits patiently on the other site. It is also prevents your dog from bothering others on the trail, and can be used to allow safe exiting and entering of the tent without the dog bolting. Crate games are an excellent way to teach a wait! If you are unfamiliar with crate games, Susan Garrett has excellent information, as well as a DVD about the topic. Practice having your dog wait before leaving the crate, on stairs, and at doors in your house.

Recall
All dogs should learn to come when they are called! In the woods this skill becomes even more important. If the leash is dropped accidentally or breaks it is important to know that your dog will come back to you. There are also circumstances when it is unsafe to navigate the terrain with your dog on-leash. A good recall means you can take your dog off-leash, navigate the terrain, and then call your dog back to you. Please follow the leash laws of the area where you are backpacking.

Reinforce your dog every time he comes back to you! A whistle recall is extremely helpful in the woods. It’s a unique sound that you can ensure is always associated with good things and can be easily heard in the woods. Start in a place with minimal distractions, blow the whistle, and give your dog a treat. Your dog will quickly begin to run to you every time you blow the whistle. Gradually increase the distance and level of distraction until your dog will run to you through the resident herd of squirrels. Remember to ALWAYS pay your dog well for coming back with delicious treats or his favorite game.

Navigate Difficult Terrain
Teach your dog to navigate any terrain you may come across before the trip. Research the area and figure out what types of terrain you are likely to see. Dogs should be comfortable crossing streams, climbing over and balancing on rocks and logs, walking through mud, and walking through areas where brush may rub against them.  

Train your dog to be comfortable with walking over unfamiliar surfaces and things that move. Start easy, reinforce your dog with a treat every time he walks over a tarp, grate on the sidewalk, or strange surfaced floor. Progress to climbing on benches, walking across walls and going under rails; dog parkour, also known as urban agility, is a great way to teach these skills! The more strange objects your dog is comfortable interacting with, the better off you will be on the trail. Go to the local park and find some streams, logs, and rocks to play on. Keep sessions fun, and always let your dog choose to interact with the objects.

Mat or Tethering Behavior 
Having a dog that will wait patiently for you to take care of the multitudes of things you will need to do while backpacking can be a serious help on the trail. For one thing, it means you won’t have canine “assistance” in meal preparation and consumption or shelter building (their lack of thumbs makes setting up the tent tricky). It also means that when you stop to take a break, your dog isn’t wasting energy chasing down dinner. Even the most energetic dog will start to get tired a few days into a trip and being tired increases the risk of injury dramatically.

Teach your dog to relax comfortably in a down on a mat. The crate games referenced earlier are an excellent way to teach this behavior as well. Simply use a mat instead of a crate. Mats can be made from anything, ideally something you were already bringing on the trip such as a sweatshirt or sleeping pad. Also, use the crate games to teach your dog to relax when you tether him to an object such as a tree or large rock. This way you can be sure your dog is relaxed and won’t accidentally wander off when you are concentrating on boiling that water just so.

Drinking and Eating On Strange Surfaces And Places
When backpacking, it isn’t often that you will want to pack your dog’s water and food bowl as well as carry all the water he will need for the trip. This is just extra weight that you can reduce through some simple training. Once your dog is used to eating and drinking out of a variety of surfaces, you will find you have a plethora of bowls limited only by your imagination. This can include: cups, plastic bags, rocks, collapsible bowls, etc.

This skill isn’t difficult for many dogs to figure out, but it is something you will want to practice before heading on your trip. Start by moving your dog’s normal bowl to different places around the house and yard. Examples include: on the couch, on the stairs, or in the backyard with the neighborhood squirrel. Do the same with the waterbowl including adding some water from a different place such as a jug you filled up from work. Once your dog will reliably do this, get creative with the bowls. Use a plate, a cup, or a grocery bag molded into a marginally bowl-like shape. If you know what you will be using as a bowl on your trip, be sure to practice with that. Eventually your dog will be unfazed if you ask him to eat his dinner off of that bowl shaped rock on the hillside while drinking out of the bag you are pretending is a bowl.

Handling and Picking Up
Your dog should be comfortable being picked up and carried short distances as well as being touched on all body parts. While we would like to convince ourselves that nothing could ever possibly go wrong in the backcountry, the reality is that things can, and do, go wrong. We can best be prepared for these bad things by planning ahead. This way, if something happens to your dog while hiking, you can carry him out, or at least get a good look at that cut on his foot.

For this skill, it is often easiest to have a helper assist you. Start with areas your dog is already comfortable with you touching (such as a shoulder) and pair that with a treat. Gradually move to areas that your dog is less comfortable with (such as feet). If your dog pulls away, let go and move to an easier area. Continue this process until you can get a good look at all parts of your dog. Now that your dog is comfortable with touching slowly begin wrapping your arms around your dog as you would to pick him up. Just like with the touching, only go as fast as your dog is comfortable. Gradually build up to picking your dog up and moving short distances. Remember to always pair this activity with a delicious treat.

Having mastered all of these skills, you and your dog are now well on your way to enjoying your next adventure. Go outside and have a blast!

Friday, January 31, 2014

TAG Think

Once you’ve been using TAGteach long enough, it starts invading your thoughts!


First, it starts creeping into how you interpret other’s teaching. In a riding lesson the other day, I was on a horse I’d never ridden before, so I fell into old nervous habits like lowering my hands to be ready to grab his mane. After being reminded a few times to keep the reins shorter, I found myself thinking, “Ok, tag point is: Shoulders back.” This brought my hands and elbows off of the horse’s neck and up where they should be without having to keep shortening the reins over and over again.


After it’s entrenched in your interpretations of others’ directions, it starts sliding into your own problems. As I was doing a conditioning session with some friends, I found I was “cheating” too much when doing assisted pistols. I thought, “how can I fix this and get better form? Tag point is: weight in heels.” It worked! I was able to push correctly with my legs and not use weird form to make the exercise easier.


Tag-think is pretty amazing - it can simplify things when you’re struggling to fix a position or understand what someone is telling you to do. Here’s some ways to integrate Tag-Think into your life!


1. Syphon other’s instructions into tag points.
Some really good teachers can use TAGteach and not realize it - narrowing their lessons into a focus point or explaining things and then cutting it down to useful bits that very much mirror tag points. Others, well, not so much. They’ll explain things until your eyes glaze over and you forget what you were supposed to learn. This method can work with both!


When a teacher explains something, think about a few things:
  • what they want you to do
  • how they’re suggesting you go about it
  • what is one specific thing you can focus on to accomplish that, or at least closer to accomplishing that? (tag points!)


Not everything can be fixed with one tag point. Each step or movement probably can be broken down into several. It can take time to learn the tag points that will work magically fix everything, but if you’re always thinking in tag, it gets easier.


2. Use Tag on yourself.
Make sure you’re using good teaching principles for yourself, too! When you’re trying to, say, fix your own form doing a difficult squat variation, don’t think: well, I have to use this muscle and that one and not twist around and lose my balance or throw my arms around to get up more easily…. I’m doing it wrong! Try to think: I want to do this squat correctly. I tend to lean forward and lose balance, how can I correct that? What tag point do I need? If your tag point doesn’t work, don’t despair! Think of a different one! If you can’t figure out a Tag Point just on your own, try watching someone else doing what you’re trying to do, and look for the key movements. You can also phone-a-friend and ask someone to watch you do it and give you a Tag Point!


3. Use the Focus Funnel
You want to teach something complicated, but your audience is not familiar with tagging, or you just don’t have a clicker. No biggie! Use the focus funnel: lesson, instructions, tag points. Start out by explaining the whole idea behind what you’re doing; this is the lesson. Then the instructions, where you explain what you want your learner to do. Finally, the “tag points,” exactly what you want your learner to do, in 5 words or less. This is essentially tag, but you don’t need to use tag language or a clicker to get your lesson across effectively. Also, you don’t need to get all the way down to tag points when explaining something that isn’t ending with giving clear, precise instructions. Just keeping the focus funnel in mind while discussing most anything can help you get to the important bits and keep from bogging them down with too much information.

Using these, you can hopefully make any interactions with others more rewarding for yourself and the other person using the power of positive reinforcement! Or, well, maybe just less frustrating. Either way, integrating TAGteach into the way you think can have a great effect on how you teach and how you learn. Good luck out there!

Here's an awesome (but LONG) video of TAG in action:


Thursday, January 23, 2014

6 Exercises For Both You and Your Dog!

Here in the midwest, winter can be a hard time for both humans and dogs to get the exercise they need. We have previously posted about exercises you can do to improve your dog’s fitness, but now we are taking it one step further. Here are six (ok, 12) exercises that are useful for both humans AND dogs. Keep both you and your dog in shape this winter so you can safely hit the woods running as SOON as the nice weather returns!


Squats:


Squats are great!  Remember good squat form for people is to have your knees directly above your toes (and not going in front of them!), back straight and tall, and to be sure you move through the FULL range of motion - at least down until your thigh is parallel with the ground and back up to vertical!


For the dog, teach him to put his front feet on a short object. Ask for a sit and reinforce for keeping the feet on that object.  Ask or lure him into a stand, once again reinforcing for keeping front feet on the object. As the dog progresses increase the height of the object until the dog can do squats with his front feet on a box his elbow height. For an extra challenge use unstable objects like a balance disc.


Handstands:  
Handstands require a tremendous amount of core strength, both for dog and human. For the human start in push-up position, feet against a wall. Move your hands inward and walk or slide your feet up the wall. Bring your feet up the wall as far as you can. As you progress, try to get your feet high enough up the wall so that your back is straight. Add duration in this position, but always remember to progress slowly!  Once you are comfortable backing into a handstand the next step is to learn how to kick up into a handstand (back to the wall instead of stomach!)


For the dog a handstand is a progression of backing up onto an object. Start small, and gradually teach the dog to back up onto higher and higher objects. Keep in mind that not all dogs are physically capable of doing a handstand, but backing onto a shoulder height box still requires quite a bit of core strength and muscle activation. You can also build strength in the position by having them slowly step forward off of a taller object and stop with front feet on the ground and back feet on the object.


Quadrupedal Movement (QM):
QM is moving with all four limbs on the ground. There are many different variations, the easiest of which is the equivalent of a dog trotting. Your hands and feet should move in diagonal pairs, keeping your legs directly under you and your back as level as possible. This exercise builds both strength and endurance and is much harder than it looks!  


Dogs do QM every day! Since we are moving how they move every day, now they are going to move how WE do every day. This exercise builds both core strength and balance for dogs and can easily be adjusted for skill level. Start by supporting your dog’s front feet either with a wall, your arm or a tall object. Gradually, he should be able to hold his front feet off the ground without assistance. As he improves ask for longer times, more back foot movement, or even squats.


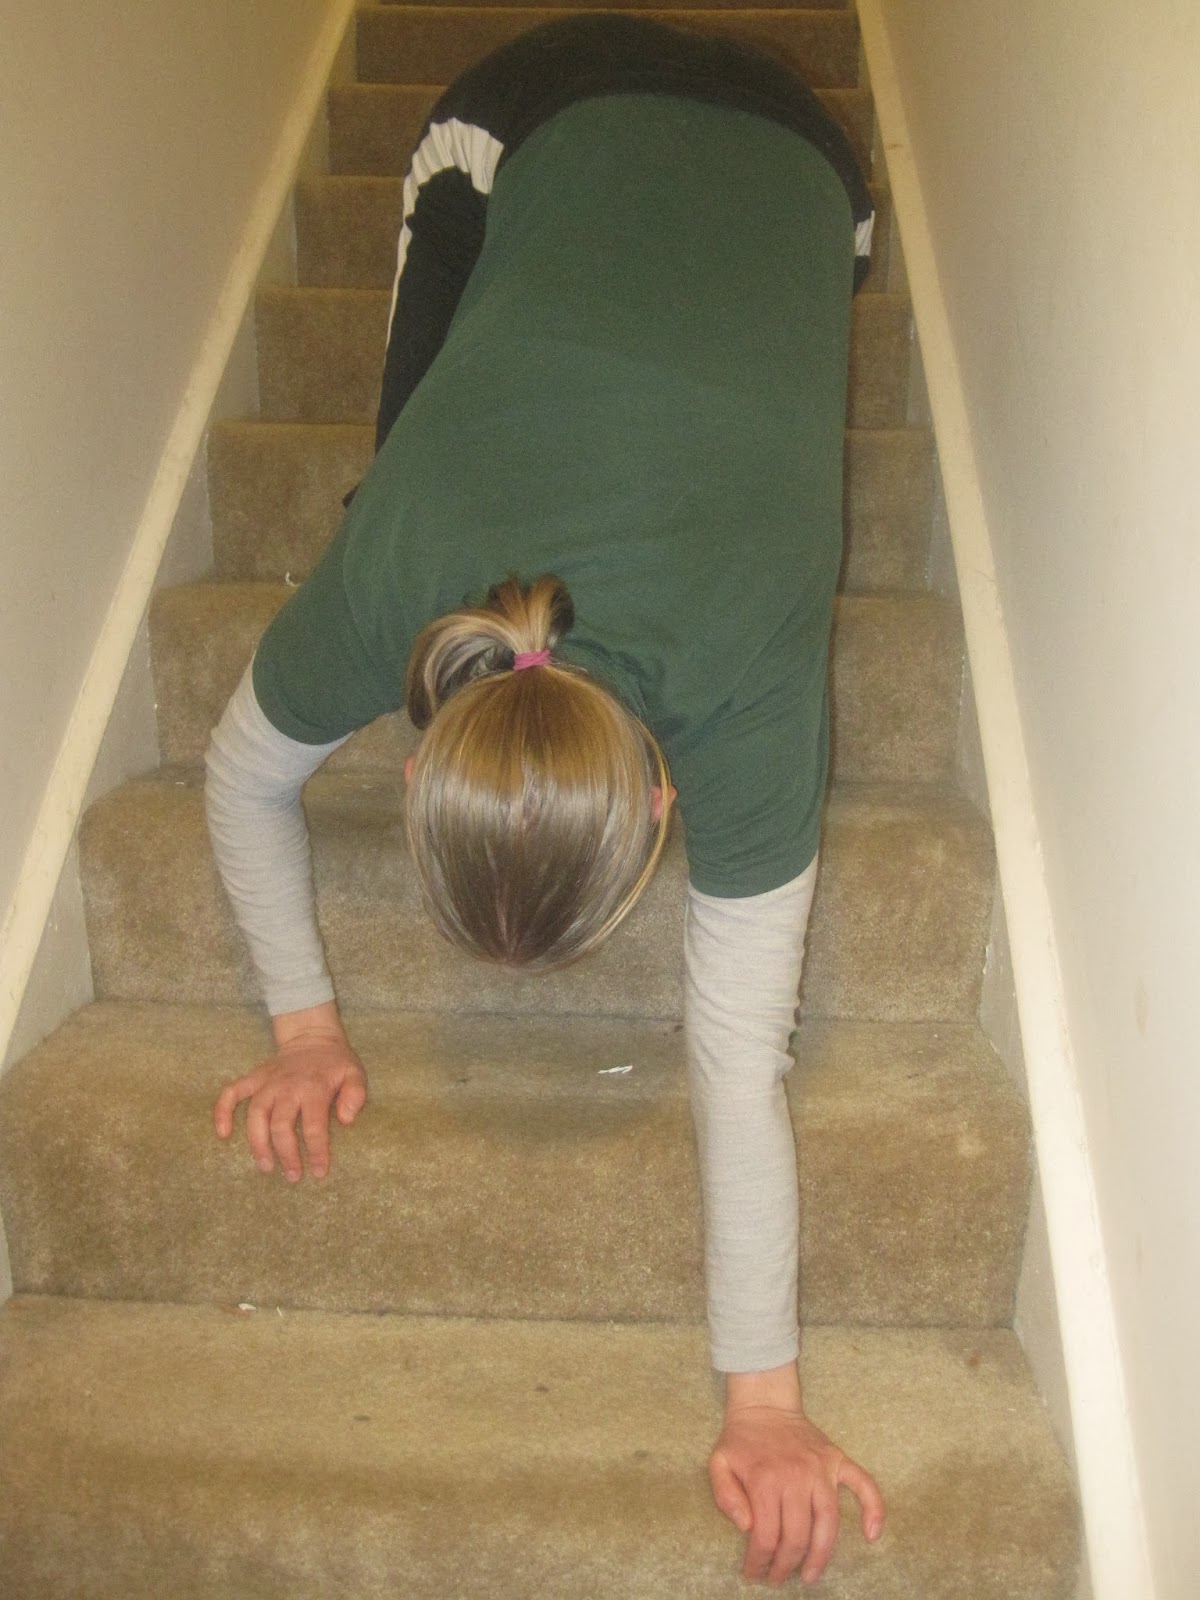
QM Up Stairs:

A very difficult version of QM is to go feet first up a flight of stairs.  This exercise requires power, strength, and endurance. You should start with a short flight of long, low stairs and build up from there.


Even though dogs move on 4 legs every day, they will still get significant benefits from learning how to back up a flight of stairs. Start low, teach the dog to back up (see http://www.youtube.com/watch?v=pUeSGHMGGGY). Progress to backing up on a low step, encouraging the dog to alternate which foot he places on the step first. When the dog is comfortable with one step progress to a staircase. Remember this is hard work! Start with only a few steps and progress to being able to do the whole staircase multiple times.


Traverse:

Traversing simply means moving in a lateral direction. One variation is for your hands to be on the ground, and feet on an object such as a wall (start low!). Move laterally, and make sure to go both directions.


Side Step: Find a low board or wall. Teach the dog to put his rear feet on the board. Either lure or shape sideways movement, start small and pay attention to the back feet.
Move sideways, in both directions. Repeat the same exercise with the front feet on the board instead of the back.


Pushups:
Pushups build upper body strength and core strength. If you are just starting pushups, start with your hands at waist height and feet on the ground. Remember to engage your core and keep your back straight. As you get stronger place your hands on lower objects until you can do push ups on the ground! Pushups can be made harder by doing them with your feet slightly elevated, or with your hands on gymnastics rings. You can experiment with many different variations. Things such as changing elevations, hand placement, and speed can dramatically change which muscles you target.


There are two variations of pushups for dogs. The first one is alternating between sits and downs. Start on the ground, and as they get stronger progress to doing them on a wobbly surface such as a “peanut” or balance pod.
Another variation is starting with rear feet on a elbow height box. Either lure your dog or have him nose target your hand. The goal is to get the dog to stretch and flex his shoulders as he reaches downward. This can also be made harder by replacing the box with something more wobbly. As he progresses you can ask for longer holds in the flexed shoulder position.


Remember, both you and your dog should ENJOY exercise so have fun and be creative, while always remembering to progress slowly and keep safety in mind! If you discover any other great exercises that both you and your dog can do be sure to comment.

Monday, January 20, 2014

Strength and Conditioning Skills: Backing Up


Skill: Backing up

Benefits: Rear end awareness, increased range of motion, rear end strength, balance

Sports applications:  Rally Obedience exercise, rear end control,  increase strength for jumping in agility and flyball, useful in household situations

Safety: Keep in mind this exercise requires a lot of strength. Progress slowly.

How to train it!:
Shape it: Click and treat for any movement backwards. Specifically look at the back feet, watch for the tiniest indication of movement. Be patient!
Lure it: Hold the treat at the dogs nose level very close to his nose. Gradually back the treat towards the nose until the dog moves one foot backwards (this will often be a back foot). Give a treat as soon as the foot moves. Gradually require more feet to move before giving a treat. If your dog sits, it likely means that you have held the treat too high.

Variations: Start with your dog backing up on the ground. Practice  with the dog at both sides as well as with the dog in front of you. When your dog is confident with all of these variations add items to back up onto. Start low, and gradually increase the height of the object. Include both solid objects and objects that move slightly. Possible variations of backing up include:
  • Onto:
    • Mat
    • Books
    • Cardboard boxes
    • Fit discs
    • Steps
    • Laundry baskets
    • Fitness Peanuts
  • Over ladder flat on ground
  • Between cones
  • Around cones

Backing Up Video